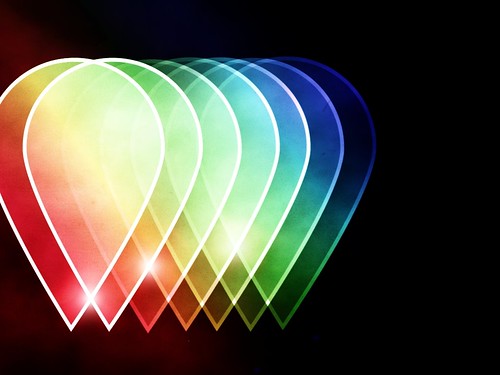
A short time ago Abduzeedo publish a tutorial showing us how to create an image inspired by Andy Gilmore's work. I really liked that technique and decided that it would be cool to do something similiar like that in Gimp as well. So this is my latest tutorial.Before you read the rest of my tutorial let's see my result!
The idea of this work is exactly my new experiment playing with layer mod,and also exploring some other technique..and for the shape..i use my own brush that i made in illustrator and convert it to photoshop brush.But don't worry because Gimp can read the photoshop brush so you will have no problem to use it..I hope you enjoy this new Gimp tutorial. and feel free leave me comment if u like it..or tell me what you think about my new tutorial because it will help me a lots..
Before you do this tutorial,download the brush HERE.
p/s: If u have problem with download link above, u can download HERE.
Create a new document. I'll used 1024 x 768. Fill it with black.

Create a new layer and named it as gradient. Select gradient tool, Radial for the shape, foreground color to transparent(FG to Transparent) and the color that i used is #bc069. Low the opacity to 60.

Then fill the gradient layer with a gradient from our foreground color to transparent..

In this work,i want the shape to be align and i need some line guide..See those blue guides? Those are Guides.Just add a guide so we can align the shape later,If you want to turn them on and off, go to View > Shows Guides.

Create another layer and named it as shape 1.Select brush tool, use white color for the brush.

Apply the brush to shape 1 layer.

Right click at my shape 1 layer.Select add layer mask.

And then Initialize layer mask to white(full opacity).click Add.You will notice a white image layer on the right side of our shape 1 layer.That is our layer mask.

Select gradient tool,foreground color is black to transparent (FG to Transparent).


Then apply the gradient to our layermask..(right click and select apply layer mask)

Duplicate layer shape 1 and renamed it as shape 2.Then,align the shape like the picture below

Repeat the previous step,until u got 5 shape layers like in the pictures.Don't forget to named each of the layer..

Create another new layer.Renamed it as shape 6. We will apply again the brush but this time i'll not apply layer mask to it.


Then duplicate it. I'll named it shape 7 layer.Move it a little bit to the left.You should get this one..

I'll change the layer mod.For layer shape 1,2,3,4,5 = grain merge and for layer 6,7 = normal

After that,create a new layer and i named it as Clouds. Fill the layer with white color. Go to Render>Clouds>Different Clouds.and apply to the layer. I use 4 for the Detail, Randomize and Tileable.

Next,changes the layer mod to Overlay.


Create another layer.I named it as spectrum gradient. Using the gardient tools select Full Saturation Spectrum Gradient , 100 for the opacity and Linear for the shape. Click the image for larger view.

Apply the gradient to the layer. Change the layer mod to Overlay.

Create another layer.Fill it with black.This time go to Lights and Shadows > Lightning effect. Use the values in the pictures. Click for larger view.


Change the layer mod to Overlay.

Now let's add a paper texture from deviant art, you can download it HERE.

Change the layer mod to overlay. and low the opacity to 40.

Next steps is create a new layer,and fill it with black.Go to Light and Shadow > Lens Flare..

Put the lens Flare like the image below..Change the layer mod to Screen.You will notice that the layer is too bright, there is too much gray.

So go to Colors>Levels. Then just change the Input Levels to 50, 1, 255.

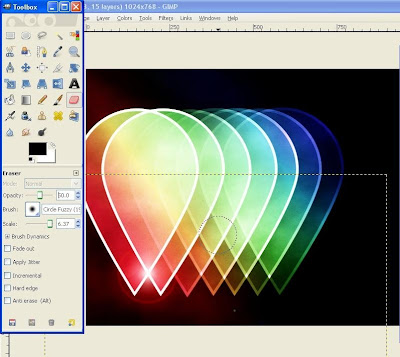
delete some parts of the image, do that until you get the result like the image below. ..I'll use eraser tool..i use circle fuzzy( Use big scale, and low the opacity). Click the image to see my value.


Duplicate the lens flare for another light effect.Put it somewhere u like..finally,create another layer and fill it with black.Change the layer mod to Overlay.You will notice that the image will get a bit darker..i intend to make it more depth..u can change the layer mod to screen, or what ever you like..

The result!

Enjoys!
I also included the Xcf file.
Click here to download the Xcf file used for this tutorial


20 Responses to "Gimp Cool Shapes Effect Tutorial"
This is a very nice tutorial ineed... I'll deffinatly use techniques from it in the future, hope you don't mind :P I can't wait to see more tutorials from you (if your going to post)
sure..u can use it for ur personal project and comercial use..
btw,thanks for your comment..i'm appreciate it..and i'll going to post other gimp tut..so stay tuned!
Thank you :D
The bolek and this is cool tutorials :D
Keep the good work.
Thanks again :D
Nice work bro.
Thank you very much for this :D
Love that you make tut of abduzeedo for Gimp.
Any chance of having the "super cool frilly bits typography" tut translated for gimp?
Keep the great work.
Thanks again
you are welcome skimor..
and for super cool frilly typo maybe i'll try in gimp..:)
Your tutorial definitely rocks !!!
Really loving it ...
Thanks and keep on the good work ;)
thanks for the comment..:)
awesome work man, keep up the tutorials, im finally getting some free time and am able to do your tutorials, i plan on using some of these tecnuiques for some art i'll be giving away as christmas presents ;) (what's better than giving art for a present, all it requires is time and creativity and only costs as much as printing) keep up the nice work :)
@ lolzlolz
:) glad u like it..dont forget to send me some of your result that you got to me..would be happy to see it..and happy christmass to you
Thank you i'm so glad you give me more technique for my picture thanks very much
welcome :)
Definitely very cool, but I don't like the shape. DO you have a similar brush that's a triangle, or maybe a tut on how to make my own brushes?
Hello puteraaladin, your tutorials awesome.
How do you put circle text on the circle picture or heart picture
example circle text if you want delete its link
http://blog.brothersoft.com/wp-content/uploads/2008/07/portable_gimp_4.jpg
Can you do circle text on the top heart with xcf file and put in here thnks
example heart if you want delete its link
http://upload.wikimedia.org/wikipedia/commons/thumb/6/6a/Heart_left-highlight_jon_01.svg/491px-Heart_left-highlight_jon_01.svg.png
Hey!
A while back I used this tutorial but I modified the brush so it would be shaped like a heart instead. Here's my result:
http://wistfulwish.deviantart.com/art/Anyway5-Take-six-117795117
I'm glad I've found you again, because I've learned a lot from your tutorials!
its like boke tutorial , great best regard Cool Gimp Tutorial
Hi!
Is it possible to invert the background to white and still keep the nice effect?
Thanks for sharing this beautiful design and easy to follow tutorial! Have a great day!
Paula
that's so simple,
but so amazing !!!
I love it :D
amazing!! thank you so much :D
Post a Comment
Type your comment here, I'll try my best, to reply!