Hello! I am Amuro. New co-writer of PA Blog. Today i've wite a Gimp tutorial and i wanna share with all of you . I hope u enjoy my post.
This tutorial is inspired by the photoshop tutorial here. Before we get started, let's take a look at the image we'll be creating:

In this tutorial, I will show you how to use some dodge and burn technique in photo manipulation.
Download them:
Stock : Here
Music brush : Here
Texture : Here
1. Now open the stock file. Using Crop tool to take the woman out.
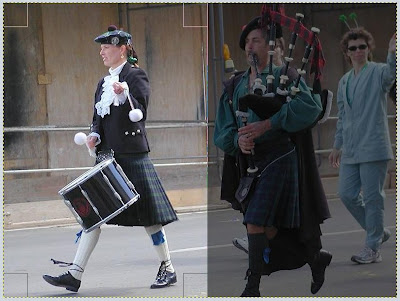
2. From the background layer. Use Blur tool on the her skin part but remember don't blur her eyes and her lips.( this step for soften image effect later)
Use Clone tool, press Ctrl on your keyboard and set the source of clone on the background layer,
Create new layer with transparency (I now call this layer is the clone layer OK) and clone on the drum to the high left corner like this:
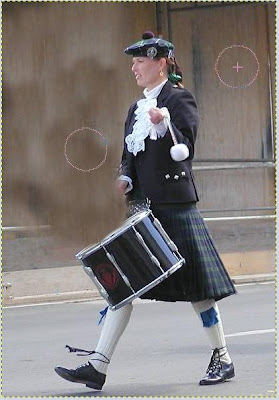
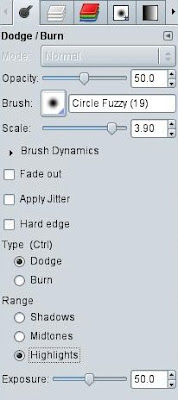
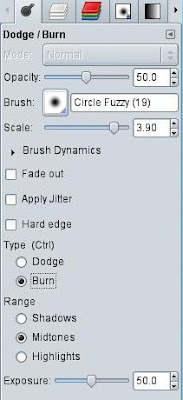
3. Select Dodge/Burn tool and do dodge some part you want it lighter, and burn some part for it darker.
Here my settings for Dodge
And for Burn :
4. After burn and Dodge, i blur some lightest part and here what i got:
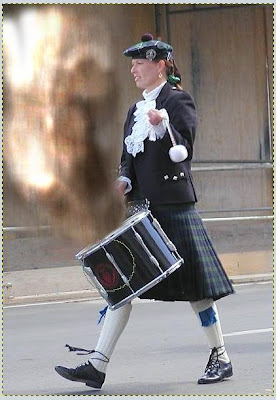
5. Add the layer mask with totaly black for the clone layer.
Change foreground to "White". Chose Painbrush tool and setting like this
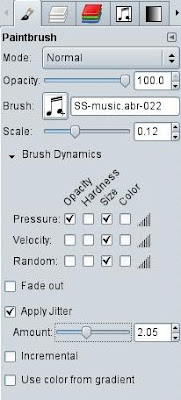
6. Ok, leave all the settings for paintbrush tool like that.
Use the path tool to creat the path from the drum to upper left corner like my path
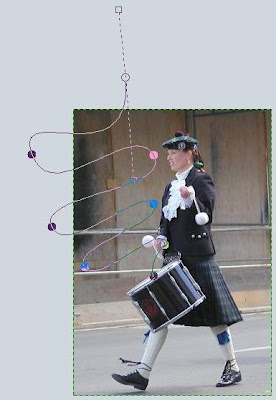
7. Now we need to chose from tool options tab, select stroke path
(You can do this by orther way :
- On the paths tab, select your just creat path
- Right mouse button click on that path to open a menu and select "Stroke Path")
On the stroke path select stroke with a paint tool
Paint tool : Paintbrush
And remember you have to click on "Emulate brush dynamics" if it wasn't clicked.
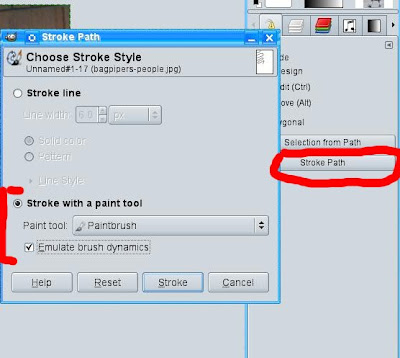
8. Now select all the layer mask and copy it. Create new transparency layer, select blend tool.
Use Golden gradient.
Shape : i chose Radial but Linear is ok too ^_~
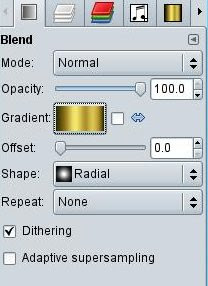
9. From the center of image or where you want do the gradient and set layer mode to "Overlay".
Add layer mask for golden gradient layer. Paste the copyed layer mask on the preview step, and apply it to the layer mask.
(If you want apply the float layer to the layer mask, make sure the layer mask you want to apply is selected. And select the anchor button on the bottom of layer display tab)

Well cause i just want to apply the overlay of golden gradient for the music notes.
10. This step is the effect softly image inspired by Julia Yu from dienanh.net
Now on the layer menu. Select new layer from the visible (you can do the same thing with copy visible and paste as Layer under edit menu)
Duplicate the visible layer you just created. Both layer set mode to "Softlight". Both layer apply the Gaussian Blur (Filter menu -> Blur --> Gaussian Blur...)
The first layer value is 5 for x,y. The duplicated one set to 10 for x,y.
Apply Desaturate under Color menu. to the duplicated one. Remember select "Average". This step is make the duplicated one to black and white. You will get something that look like this :

11. Select the Blend tool (Gradient tool it is). I use "Full saturation spectrum CW" gradient, Shape : Linear
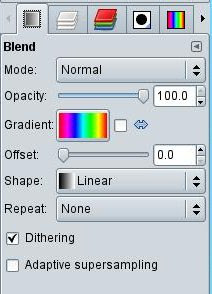
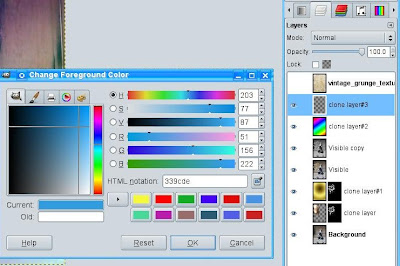
13. Do the gradient from the upper left corner to the bottom right corner. Set layer mode to "Diffiirent" and with Opacity to 20. Create new transparency layer and fill it with color( i use color #339cde) set layer mode to "Softlight" Opacity to 40
14. Now final step is chose Files menu -> Open as Layer and select the texture you had downloaded. I use "vintage_grunge_texture 1.jpg"
Blur -> Gaussian Blur with 5 for x,y, set layer mode to "Softlight" and you will get the image that look like this :

Have Fun with Gimping and Good luck for you.
Happy New Year 2009 too.
Thanks for reading.
~ Amuro Ray VV


2 Responses to "Gimp: Musical Tutorial"
Thanks amuro for posting these one..:)
np :D
Post a Comment
Type your comment here, I'll try my best, to reply!