Following my series of Gimp tutorials, I will show you how to add HDR-like effect to a normal potrait picture in Gimp. I used a photo of a man that I found on sxc.hu. If you like this tutorial, leave a comment and i hope you enjoy it. Cheers!! :)
Before we start this tutorial,let's take a look at the original image and the final image below:
Original image:
Final Result:
In this tutorial I will show you my technique to add HDR-like effect to a normal potrait photo. The technique used some basic Gimp filter like Unsharp Mask and Neon, and also playing with layer mode.
Note: For this tutorial, you need to download the image HERE. I'm using Gimp 2.6 for this tutorial. So without further ado here is the tutorial:
1. Open the image in Gimp

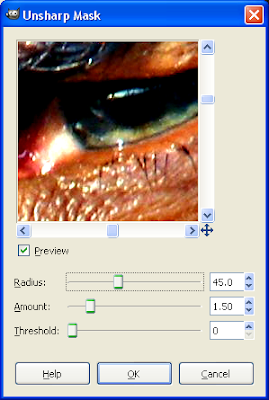
2. Duplicate the layer. Next, go to Filters > Enhance > Unsharp Mask.

3. I use 45.0 for the Radius, 1.50 for the Amount amd 0 for the Threshold.

4. Renamed the layer as "unsharpmask".

5. Duplicate the "unsharpmask" layer. I'll name this one as "overlay unsharpmask".

6. Next, at the "overlay unsharpmask" layer, I'll add a layer mask.

7. Fill the layer mask with black color.

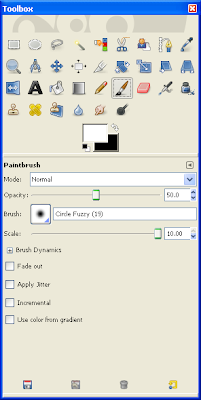
8. Select the Brush tool. Select Circle Fuzzy brush, Scale= 10.0 and low the opacity of the brush to 50.0.

9. Set the Foreground Color to White and begin painting directly on the Layer Mask. You're looking to paint over all the areas where there are highlights. To strengthen things like the wrinkles, you should paint light next to the dark but not over it.

10. Next, duplicate "unsharpmask" layer and renamed it as "neon".

11. Put the "neon" layer above all layer.

12. Next, go to Filters > Edge Detect > Neon.

13. I use 6.0 for the radius and 0 for the amount.

14. Change the "neon" layer mode to Screen.

15. For final adjustment, duplicate the neon layer and low the opacity to 50.

Finish.
Very good easy to follow thanks ^_^
ReplyDeleteThanks John :)
ReplyDeleteGreat! very good, thank you very much....
ReplyDelete